Order overview

How do I assemble the Acoustic Wall Art?

Do you have a (new) Acoustic Wall Art in your home? Time to put it together! But how do you do that? Tips and instructions on how to assemble your Acoustic Wall Art are given below.

Acoustic-Wall-Art-interior

The do-it-yourself package

You will receive the Acoustic Wall Art as a kit for a hands-on creative experience! Each package includes a textile change canvas with your chosen Photo, an aluminium frame and a soundproof panel.

To easily assemble the aluminium frame, you will receive the following parts:

  1. Frame parts (4 pieces) – This forms the base of the frame.
  2. Corner profiles (2×4 pieces) to mount the frame parts together.
  3. Soundproof panel including mounting pieces and Velcro.
  4. Suspension brackets (2 pieces)
  5. Allen spanner (1 piece)

Step 1: lay everything out on the ground

Lay the different parts of the aluminium frame on the ground. Pay close attention to the difference between the front and back of the frame. You can recognise the front of the frame by the open part of the frame, where the Cloth is placed.

Step 2: Slide the corner profiles into the frame

After laying out the frame on the ground, you can easily screw in the corner profiles. Lay the 2 different corner profiles (at the bottom of the plain corner profile with the corner profile with holes on top) on top of each other. Slide the corner profiles lying on top of each other into the frame, then slide another part of the frame over the free corner profile.

Use the supplied Allen key to tighten the corner sections. Make sure the frame parts fit together as tightly as possible for the best effect.

Acoustic-Wall-Art-detail

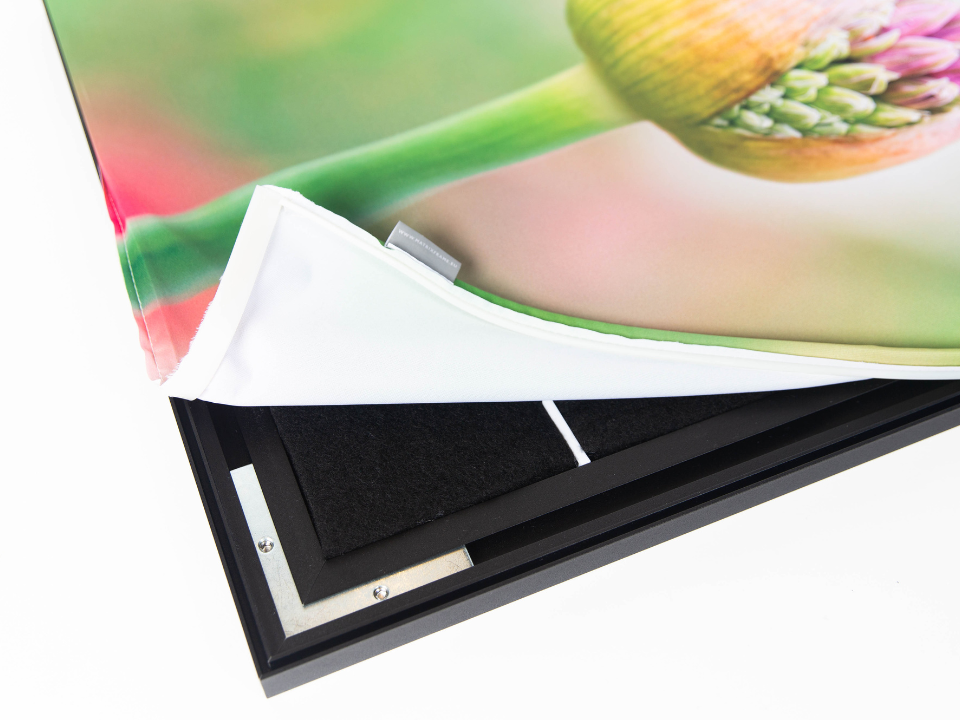
Step 3: Place the sound-absorbing panels in the frame

Before inserting the acoustic panel into the frame, screw the white mounting pieces into the frame. When the mounting pieces are firmly screwed into the frame, you can attach the acoustic panel (with the hard side facing the wall) to the panel.

Stick the supplied corners (with a Velcro and adhesive side) on the wall, behind the soundproof panels. This keeps the panel extra well in place.

Step 4: Stretch the changing fabric

Place the interchange fabric over the frame. First push the plastic tendons (at the ends of the swap fabric) into the 4 corners of the frame. Then push the long sections into place. If you have placed the cloth correctly, you will not see any white tendons on the front of your acoustic wall decoration.

Acoustic-Wall-Art-product

Step 5: Screw the suspension system to the wall

Drill holes in the right place (optionally use a plug depending on your wall) and Screw the hanging brackets Spirit Levels into place. Place the frame over the brackets and your frame hangs!

Enjoy your new Acoustic Wall Art!

Your ArtFrame is ready to be enjoyed.

Change your cloth!

The nice thing about an Acoustic Wall Art is that you simply place the cloth in the frame. It is possible to order separate changing cloths, so you can order a new cloth whenever you want and change the atmosphere of the room in an instant.

Think of a nice holiday photo after the summer holidays or a nice Christmas print during the holidays.